
Many companies require a specific signature at the bottom of emails. Even if it isn’t mandated, it’s nice to have. Often, your IT professional will set this up for you when you have a new Outlook account. But sometimes your information changes.
There are also some cases where you may want to use a different signature for specific situations. For example, A lot of users have multiple inboxes. An accounting clerk may be responsible for two email inboxes. This person might have an inbox with their name as their email address, and another more generic email account such as Accounts Payable. This user may want a separate signature for each inbox.
Although we don’t mind making those updates for you, you may want to know how to do it yourself. It’s easy! Here’s how:
Your Information
First off, what kind of information should you add to the end of an email? This is entirely up to you and/or your company. At a minimum, I recommend your name, company name, and main office phone. You may also want to include your mobile phone number, website address, logo, or other information.
Finding the Signature Setup Window
There are at least a couple of ways to access your signatures in Outlook.
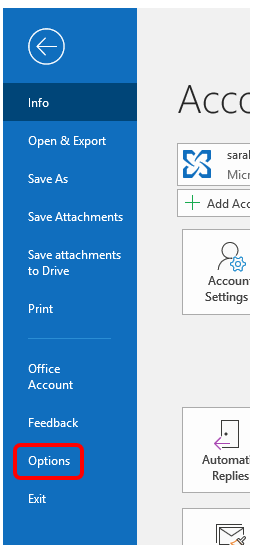
Through the File menu
- In Outlook, click File at the top left.

- Then click Options
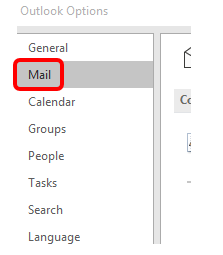
- Select Mail on the left
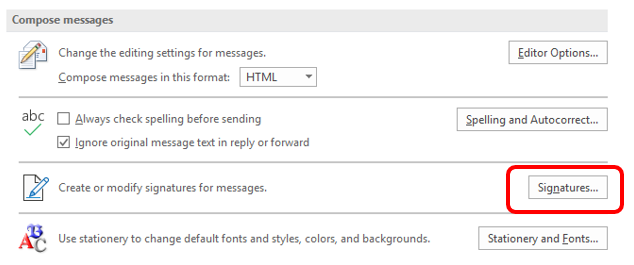
- Click Signatures, located under Compose Messages
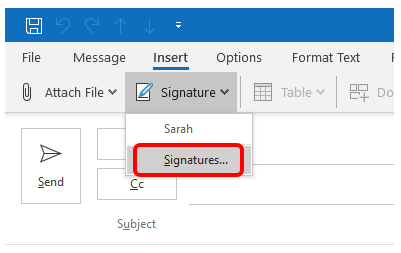
Open it through a new Email window
- Select New Email at the top left of the main Outlook screen.

- Choose the Insert Tab
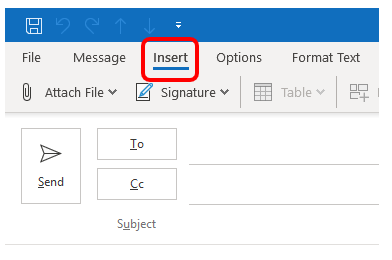
- Then select the drop-down arrow next to Signature
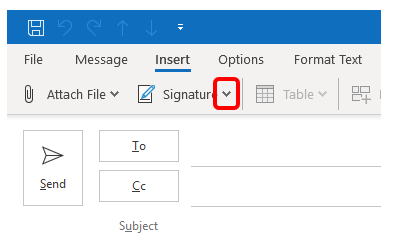
- Then select Signatures
The Signature Window
In the Signature window, you will see a list of existing signatures on the top left of the screen.

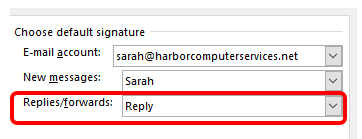
On the top right, you can choose which email address (if you have multiple accounts) that is associated with the selected signature.

Below that, you can choose which signature you may want for new messages and for replies/forwards.
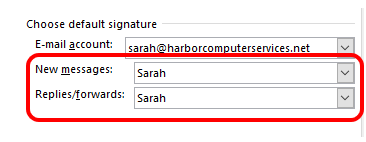
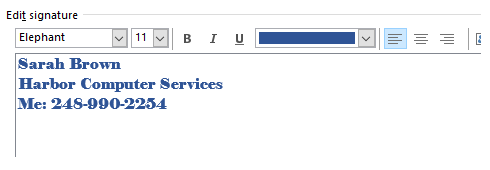
The bottom half of the screen is your editing window.
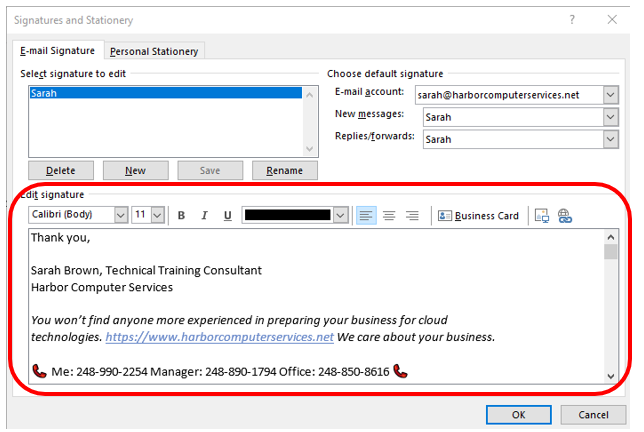
Create a New Signature
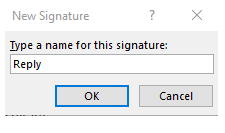
For this example, I will create a new signature to use when replying to an email thread that already exists. This signature will not need to be as formal or include as much information.
- Select New under the signature list.
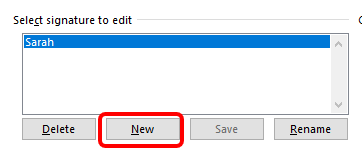
- Give it a name.
- Create your signature in the editing box. Here you can change the font, text color, and size. You can also include a Business card from your address book. (Stay tuned… I will cover this topic in a future blog post.)
- Save your work.

- With this signature, I want it to work with replies and forwards, but not new messages. So I will select the new signature under the Replies/forwards drop-down box.
- Click Ok and you’re good to go!
Give it a try!
See? That was easy. Go ahead and give it a try.
A bit of caution: Please make sure that you stay within your companies’ guidelines when creating signatures. Be sure to always represent your company is a courteous and professional manner.
About Harbor Computer Services
Harbor Computer Services is an IT firm servicing Southeastern Michigan. We work exclusively under contract with our clients to provide technology direction and either become the IT department or provide assistance to the internal IT they already have. We have won many awards for our work over the years, including the worldwide Microsoft Partner of the Year in 2010. We’re the smallest firm to have ever won this most prestigious award. Most recently we were recognized as one of the top 20 visionaries in small business IT by ChannelPro Magazine (2015). And in 2016 as the top Michigan IT firm for Manufacturing. There are a few simple things that make Harbor Computer Services the best choice for your business. •We are Professionals •We are Responsible •We are Concerned About The Success of Your Business


